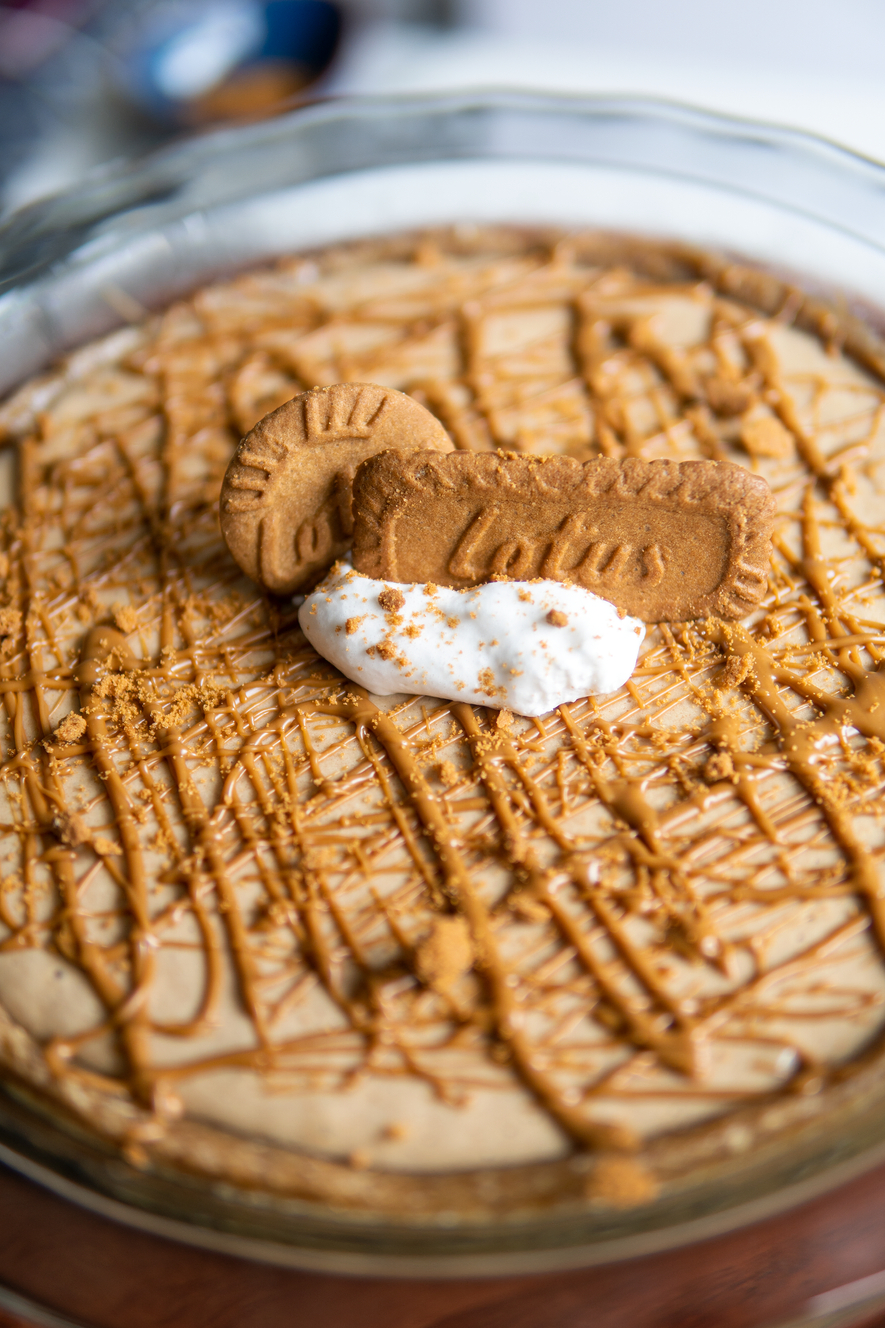
Every now and then I like to indulge in some decadent desserts, so I decided to whip up my favorite Vegan Biscoff Cheesecake. This dessert is easy to make and is so rich and flavorful, you can either use my homemade crust or you can use a store bought graham cracker crust (Keebler makes Vegan ones that are really good).

A flourless, gf pie crust? YESSS PLEASE!
The pie crust I made for this pie came out exactly how I wanted it to – light, soft, and went perfect with the filling. I didn’t want to use crackers or oreos and put a bunch of melted vegan butter, I also didn’t want to put in all the hard work of making a pie crust with flour, etc. I wanted something simple with a minimal amount of ingredients and was quick to make. So I thought of what I traditionally use instead of butter or oil, something that would still hold together into a dough form. Dates!!!
They are so sweet in flavor and gooey in texture, making them the perfect ingredient to hold my crust together. I made my crust with a mixture of cashews and walnuts, but you can use whatever mixture of nuts you like – just make sure you’re using 1 1/2 cups total of mixed nuts.

Homemade Vegan Whipped Coconut Cream is HEAVEN!
I wanted to make sure the filling would be nice and creamy, but if I threw a whole can of coconut milk in the mix, it would get tasty – yes, but it would be thick. I wanted to make sure it was light and creamy, almost like a cheesecake texture. Only way we can achieve that is by folding whipped cream(vegan of course) into the filling. Well, I didn’t want to use store bought, because I wanted to keep this completely free of refined sugar…so I made my own and it’s so easy.

Why Biscoff is so damn addictive!
Biscoff is one of my favorite cheat sugary snacks.. It’s very rare that I’ll use ingredients like cookie butter or Biscoff in my baking, mainly because it’s made with loads of sugar and it’s not gluten free. But every now and then, I’ll cheat and indulge in something decadent like this.
At first, I would just eat biscoff cookies with my tea or coffee..but then I tried the Biscoff spread and umm.. yah – let’s just say it was not a pretty sight. Spoon in hand going into the little jar of Biscoff spread like it was some kind of drug.. it was SOO. DAMN. GOOD!
The best part about this spread is that you can use it for so many different baking items. I’ve used it in cheesecakes, cookies, fillings for cakes/cookie sandwiches, and cupcakes. It’s the perfect cheat ingredient.


Vegan Biscoff Cheesecake
Description
Ingredients
For the crust:- 1 1/2 cups mixed nuts (I used 1 cup walnuts and 1/2 cup dry cashews)
- 1 tsp coconut sugar
- 1/2 cup pitted dates (about 10 dates)
- 12 oz silken tofu
- 1/2 cup Biscoff spread/cookie butter
- 1/4 cup pitted dates
- 3-4 tbsp almond milk
- 1.5 tsp vanilla bean paste/extract
- 1/2 cup coco whip (store bought or homemade)
Ingredients
Instructions
Whipped coconut cream
-
This recipe calls for 1 can of refrigerated coconut milk (full fat) with the cream scooped up from the top.. do not use the liquid part
-
Place a steel mixing bowl in the freezer about half hour before you're about to make the whipped cream.
-
When ready, add half of the coconut milk (reserve the other half for going into the blender with the peanut butter) into the chilled steel bowl
-
Whisk until stiff peaks form
-
Keep in the fridge until ready to use
Vegan Biscoff Cheesecake
-
Make the crust by adding the mixed nuts and coconut sugar to a food processor with the s blade and pulse until it's reached a very fine texture
-
With the speed set to low, start adding the dates in one by one then increase the speed to high. Mix until it's become a dough texture.
-
It's done when you can hold the mixture and it holds together
-
Transfer to a pie plate and flatten to make a crust going up to the edge
-
Cool in the fridge until the filling is done
-
To make the filling, add the silken tofu, Biscoff spread, dates, vanilla extract, and almond milk to a high speed blender (I used my Vitamix).
-
Blend until smooth - transfer to a bowl and fold in the coco whip
-
Transfer to chilled pie crust and smooth the top
-
Keep in freezer 2-3 hours

-
Enjoy


No Comments